Welcome to the world of perfectly seared, professional-grade steak. If you’ve ever been to a top-notch restaurant, you know that the sear on a steak can elevate its flavor and texture to a whole new level. But, have you ever tried to replicate that perfect sear at home? It can seem intimidating, with endless tips and tricks floating around on the internet. Fear not, because in this article, we’ll break down the process of mastering the perfect sear on a professional grade steak, so you can impress your friends and family with your culinary skills.
Understanding the Magic Behind a Perfect Sear
First things first, let’s understand what exactly makes a perfect sear. It all boils down to one word – Maillard. It’s a chemical reaction that occurs when heat is applied to protein-rich foods, like steak. This reaction creates a golden brown crust on the surface of the steak, and as a result, releases a rich, meaty flavor that takes the steak to a whole new level. The key to a perfect sear is to achieve the Maillard reaction while not overcooking the steak.
The Right Steak for the Perfect Sear
Now that you know the science behind a perfect sear, let’s move on to the most crucial part – selecting the right cut of steak. When it comes to achieving a perfect sear, not all steaks are created equal. You need a steak with good marbling, which means it should have a good balance of fat and lean meat. This helps in the Maillard reaction and also keeps the steak juicy and tender. Some of the best steaks for a perfect sear include ribeye, New York strip, and filet mignon.
Prepping the Steak for the Sear
Before you put your steak on the heat, there are a few things you need to do to ensure the perfect sear. First, make sure your steak is at room temperature before cooking. This will allow for even cooking throughout the steak. Next, pat the steak dry with a paper towel and season it generously with salt and pepper. This not only enhances the flavor but also helps in achieving the perfect crust. You can also add in some herbs or spices to elevate the flavor profile of your steak.
Choose the Right Cooking Method
To achieve the perfect sear, you need to choose the right cooking method. The two most common methods are pan-searing and grilling. Both methods have their pros and cons, but the key is to have a really hot cooking surface. A cast-iron skillet or a grill pan works best for pan-searing, while a grill heated to high temperatures is ideal for grilling. Whichever method you choose, make sure to preheat the cooking surface for at least 10-15 minutes to get it nice and hot.
Mastering the Sear
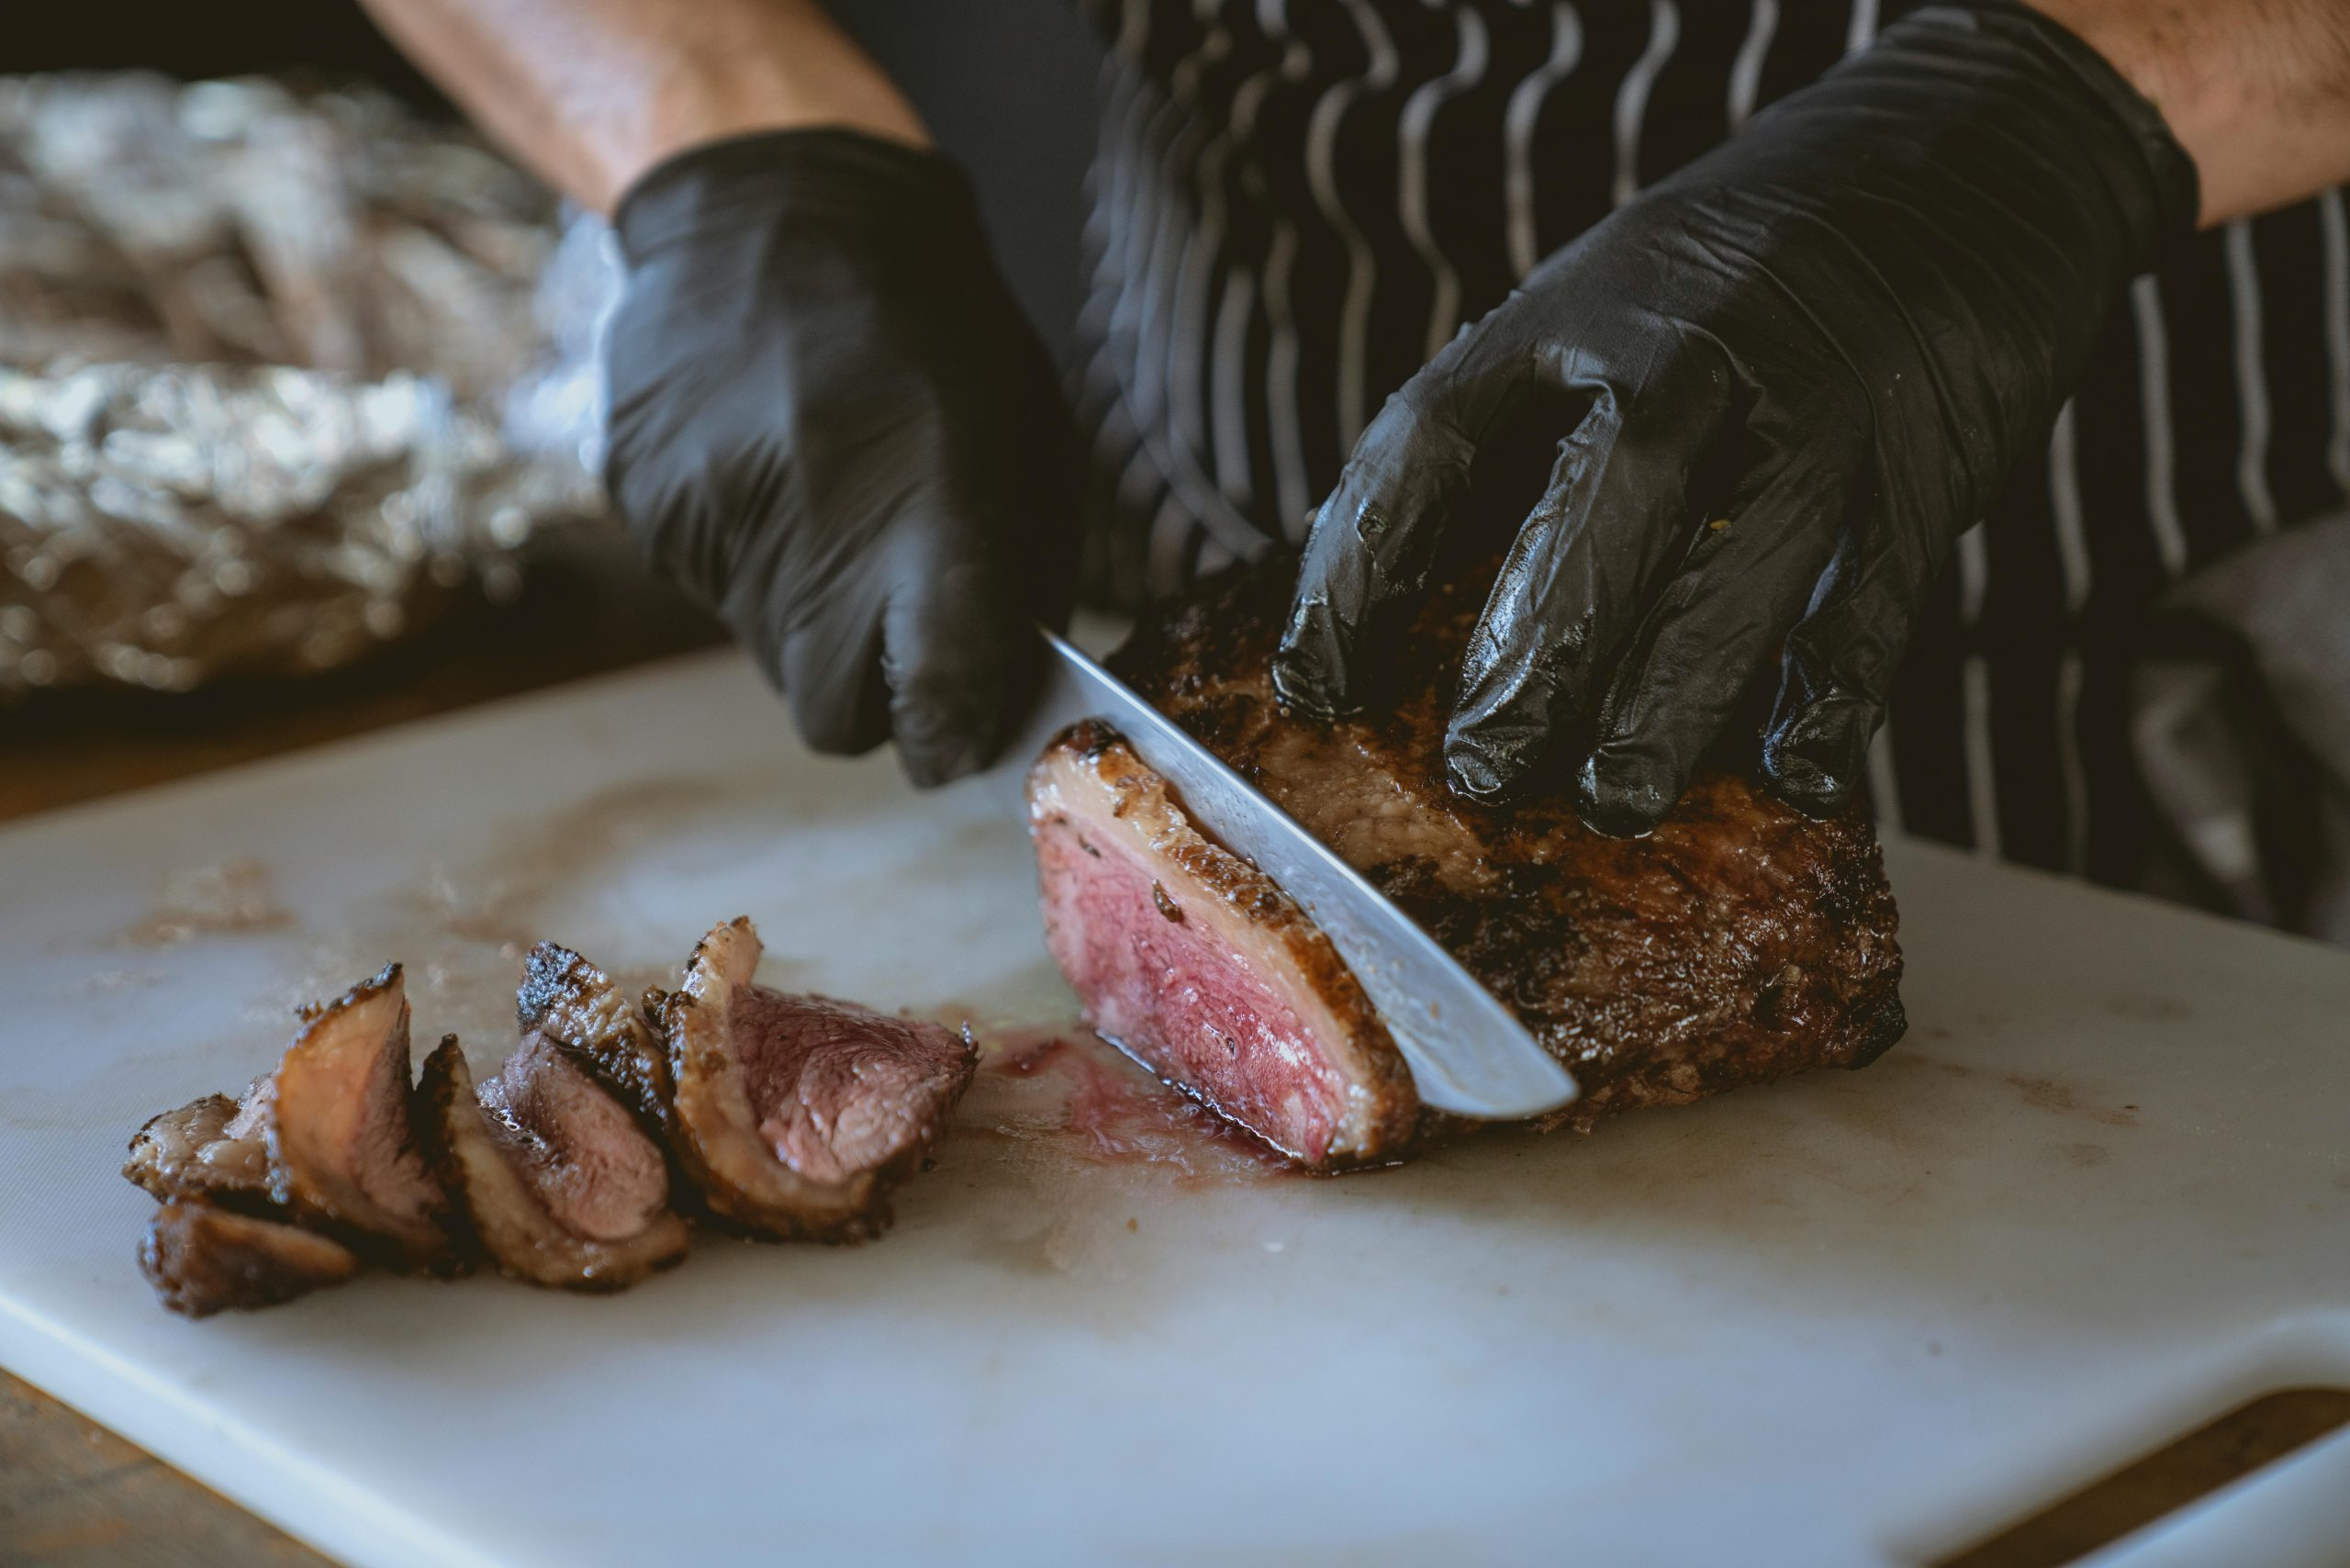
Now that your steak is prepped and your cooking surface is hot, it’s time to put your steak on the heat. The most crucial part of achieving a perfect sear is to not move the steak around once it hits the cooking surface. Leave it undisturbed for 3-4 minutes, depending on the thickness of the steak. This will allow for the Maillard reaction to occur, creating that delicious crust. After 3-4 minutes, flip the steak and sear for an additional 3-4 minutes. Use a meat thermometer to check for the desired level of doneness – 120-130°F for rare, 130-140°F for medium-rare, and 140-150°F for medium.
Resting and Serving the Perfectly Seared Steak
Once your steak has reached the desired level of doneness, remove it from the heat and place it on a cutting board. Tent it loosely with aluminum foil and let it rest for 5-7 minutes. This allows the juices to redistribute and ensures a juicy and tender steak. After resting, slice your steak against the grain and serve immediately. Get your camera ready, because your perfectly seared steak will be Instagram worthy!
Final Thoughts
Mastering the perfect sear on a professional-grade steak may take some practice, but with these tips, you’ll be able to achieve a deliciously seared steak in no time. Don’t be afraid to experiment with different cuts of steak, cooking methods, and seasonings to find your perfect sear. And remember, a steak is only as good as its sear, so don’t skimp on this step. Happy searing!
Leave a Reply